Recipe: Garlic Mayonnaise Potato Salad with Toasted Hazelnuts

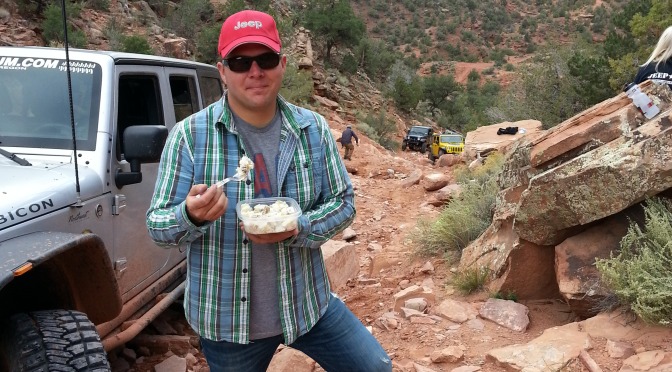
Me enjoying this salad in Moab, UT. Okay, make fun of my shoes then move along.

When we are on the trail, one of our fav things to toss in the ARB is some potato salad. Its pretty easy to make, keeps well, and is filling.

While we were in Moab, Melanie made up a batch of my FAVORITE potato salad, from the Cornucopia Restaurant cookbook.  This is the best vegan restaurant in Dublin, Ireland and is my staple (the staff remember me, how scary is that) every time I am there.  So, buy their book!

Whip up a batch of this amazing salad!

Borrowed, with love from their cookbook (convert your stuff here, I kept it metric to look all fancy and stuff):

You will need:

  • 150g hazelnuts
  • 1kg baby potatoes
  • 50g (medium bunch) parsley

Garlic mayonnaise dressing:

  • 100g good-quality mayonnaise (Scott: I suggest veganaise)
  • Juice of 1/2 lemon
  • 2-3 cloves of garlic, peeled and chopped roughly
  • Salt and pepper

Preheat the oven to 180 C. Spread the hazelnuts on a baking tray and roast them for 8 minutes. Set them aside to cool and then rub them between your hands to remove the loose skins.

Chop the baby potatoes into bite-sized pieces – either halves, quarters or slices, depending on how big they are.  Place them in a large pot, cover with lightly salted cold water, bring to the boil, cover and simmer for 15 minutes or until tender.  Drain and set aside.

Meanwhile, make the dressing by blending the mayonnaise, lemon juice, and garlic with a stick blender or in a food processor.  Season with salt and pepper.

When the hazelnuts and potatoes are cool, place them in a large bowl. Chop the parsley and add it to the bowl, reserving a little for garnish. Fold in the dressing evenly, taking care not to break up the potatoes.  Serve sprinkled with parsley with a crisp green salad.
TRAIL REPORT: FINS N’ THINGS [Utah]

The group left Burley Idaho around 9:00AM, and we finally pulled into Moab around 2:00PM. Stopping at our houses for only about an hour, we quickly emptied the Jeeps and prepared for our first Moab trail:  Fins N Things.

After a quick air down and a drivers’ meeting at the base of Baby Lion’s Back, we were soon scaling up the incline that is a much tamer version of its’ feared (and closed down) parent not too far away.

A quick air down for the Jeeps at the base of Baby Lion’s Back.

All the Jeeps scaled up the face of BLB and headed toward the steep descent on the other side.  However, a pair of Jeeps that passed us warned of 6 foot deep water crossings and mud.  After a quick inspection, it was decided to skip that and head back the way we came.

Heading down Baby Lion’s Back.

We decided to run the second section of Fins N’ Things to save a little time, as it was late and we had been in the Jeeps for over two days at this point.

About to take Frank up a nice set of Ledges on Fins N’ Things.

Fins N’ Things is named after the fins on the back of the Stegosaurus – one of my childhood favorites.  This is due to the trail’s almost constant up and down motion.  When coupled with the smooth, slick rock, you can see how the name fits.

More fins.

The light continued to get lower and lower as the shadows grew longer and longer.  It was time to leave the trail and head back to the house for some much needed R&R.

I highly recommend this trail for any Jeeper that goes to Moab.  It was a perfect warm up and let us PNWers get a feel for the slickrock and also gave a taste of what is to come in the following days.

I am pretty sure a stock rig would have no problems on Fins N’ Things.

Heading back as the light continued to get lower.

Roadtrip: Off to Moab

Remember when you were a kid on the night before Christmas?  It was the one time of year you actually went to bed early.  The torture of it all however, was that you were so excited you could not fall asleep.

Last night I felt like a 6 year old kid in jammies trying to fall asleep before Santa showed up and drove me off to Moab in his Jeep.

Wait.  That sounds weird.

Anyway, today we are off to Moab for a week to explore some trails and have a great time.

The group, on Highway 84 to Moab.

Keep up with our adventures right here on Off-road Vegan!

Product Review: Artec Dana 44 Axle Armor Kit

One of my favorite mods for the Jeep is armor.  I don’t think having a super capable rig is all that important if you slide off a rock and slam open your oil pan/transmission/diff cover/transfer case/gas tank/etc.

The Artec installed on my 2013 JKUR. I applied the custom paint.

So the Artec Axle Armor Kit has been on my wish list for some time now for the following reasons:

  • Appealing design will allow me to upgrade the actual axle in the future, where sleeves really limit this;
  • Price point ($249)
  • Ability to order from Northridge 4×4 (free overnight shipping)
  • I feel the truss design is stronger than a sleeve/gusset approach.

I ordered the kit in the Summer, and stalled on the installation.  This was purely due to cost and the PITA factor.  I would need to remove the entire axle, put it in our Ford Fiesta, and drive it to a shop to be welded in.

Thankfully, the guys at 4 Wheel Parts in Portland hooked me up and offered to weld it in for a great price (along with some new Alloy USA ball joints).

This kit is amazing because:

  • It is built of SOLID, thick steel plating
  • Had amazing tolerances for fit
  • Includes some great armor: Front LCAs, Gussets, AND the truss

The only real downside to installing this kit is the fact it needs to be welded in by a competent welder.  This is due in large part to the metals on the axle – the cast on the pumpkin has some sensitive welding needs.

But that downside is not due to Artec, it is just the nature of the beast!