
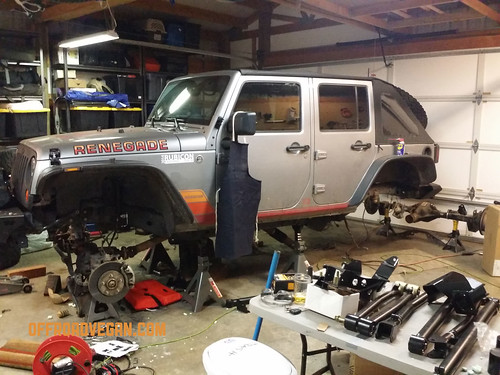
One of the last major upgrades I needed to make to my Jeep was a proper lift. I have been happily running the Teraflex 2.5″ “Budget Boost” but we all know those do not offer the benefits of a real lift.
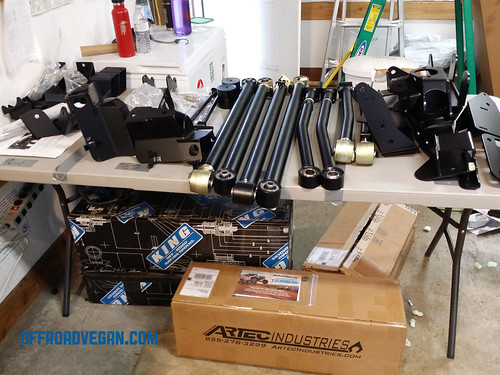
So I recently ordered the Evo Long Arm upgrade kit and 4 Evo spec King coilovers for my suspension.
The install is cutely referred to as “bolt on” but there is very little bolt on about this. It actually really irritates me that it is branded as such.
Evo should consider this a “hybrid solution” that requires minimal cutting and easy welding.
You will spend countless hours grinding off stock frame parts and drilling new holes. No instructions are provided (none as in ZERO, NADA) so you will also spend a good amount of time with puzzle pieces and counting hardware parts to see what bolts go where.
So I wanted to write this huge post as a way to help those that are about to undertake this install. Hopefully my tips and tricks will save you time and frustration. Grab a cold one, sit down, and read through this post before starting your own kit.
An important caveat to this install is that there are actually a lot of variations and things to be aware of. It would be a lot of work to document and photograph every step we took, so I will provide photos where I feel they will add some value for your install.
So do not consider this as a step by step set of instructions, but more of a reference guide.
THINGS THAT CAME IN HANDY:
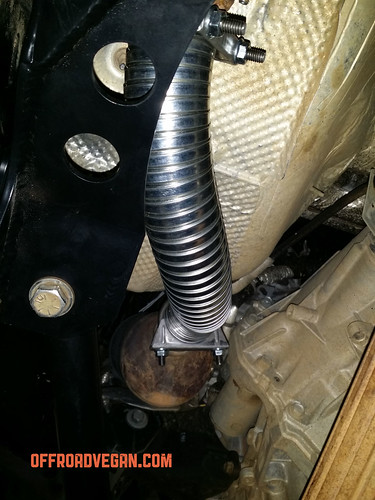
- 2″ x 18″ flexible exhaust pipe kit
- Tapered reamer
- Flap discs (60/120 grit)
- Short and long metal sawzall blades
- Face shield
- Ratcheting wrench set (metric)
- 4x 12 ton jack stands
- 4x smaller jack stands (for axles, etc)
- Magnetic tool retriver
- Black spray paint
- Much, much more!
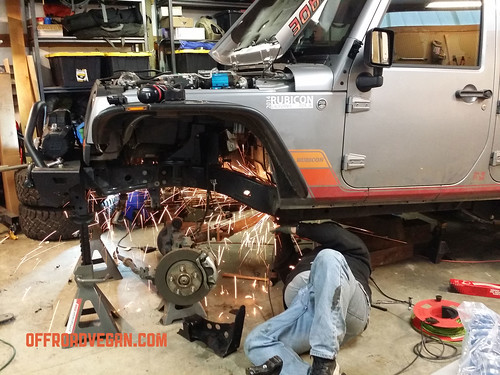
Week 1: Demolition
Solicit the help of Jeep friends. This is critical to success! Having other opinions and ideas really helps, as well as a second set of grinders and saws. Plus it is a boost to morale when it can be so maddening and frustrating. Remember to feed them well.

You will need a TON of cutoff wheels and sawzall blades. Also have a can of good black spray paint handy. I laid out all parts by kit on a table and ensured the hardware was present and everything looked good. Also be sure you have a VERY good 1/2″ drill bit, Cobalt is best. If not, have many others as these are critical for this kit.
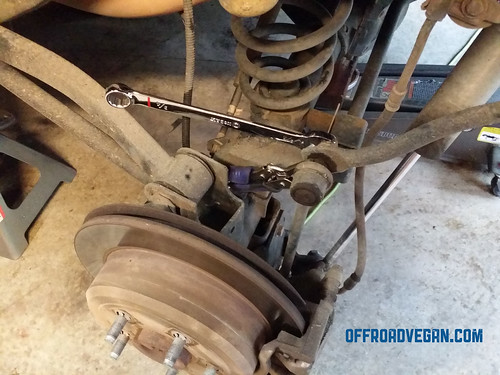
We started with the rears and used 12 ton jack stands. You will want the Jeep as high up as possible, so use the biggest stands you can get. Be sure to add staging wood underneath for safety.
Starting with the rear axle, remove the tires, sway bar links, sway bar (and brackets from the frame), shocks, and upper control arms. Place the axle on smaller stands and remove the lowers. If you wanted to, remove the brake lines now if you are upgrading them.
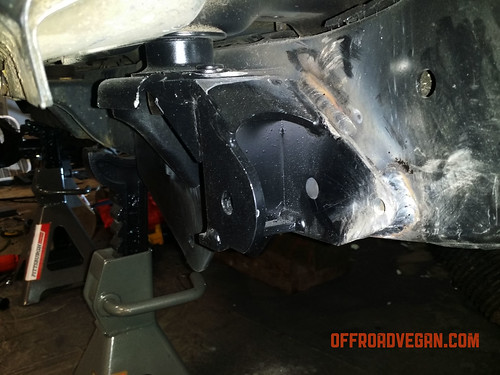
Consult diagrams to see what brackets on the frame need to be removed. Cut and grind them off to a smooth finish.
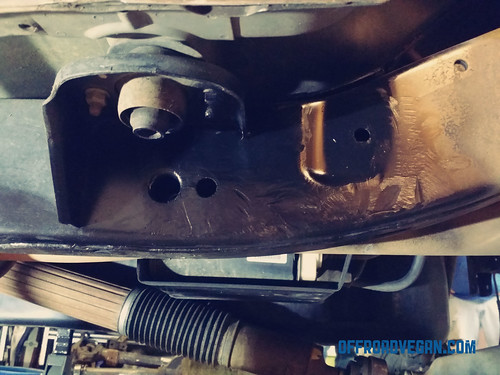
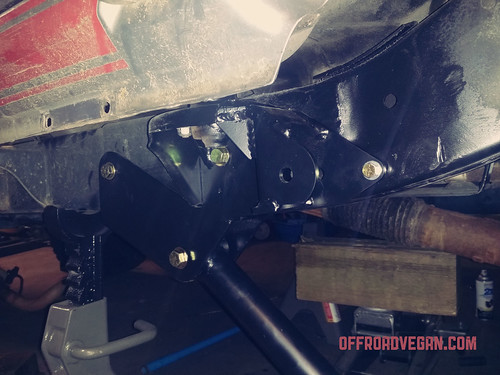
Do a test fitment of the brackets. If needed, grind and refit.
NOTE: To ensure proper fit, we used a jack and wood to apply upward pressure to the bracket. Visibly inspect to make sure it is making proper contact with the frame and not sticking.
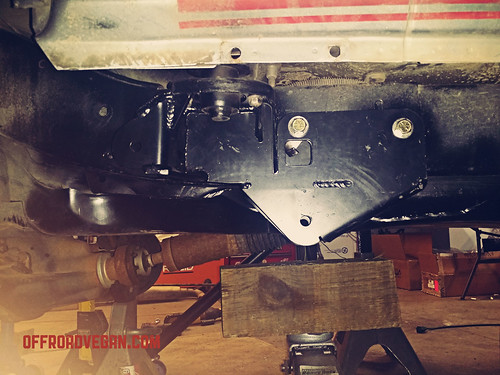
Once the fit is ready, spray paint the frame (and bracket) as needed. NOTE: on the passenger side, the gas tank is very close to where you are cutting and grinding. Be safe and use caution when grinding the gas tank skid plate, which we had to do. We removed the entire tab for the gas tank skid.
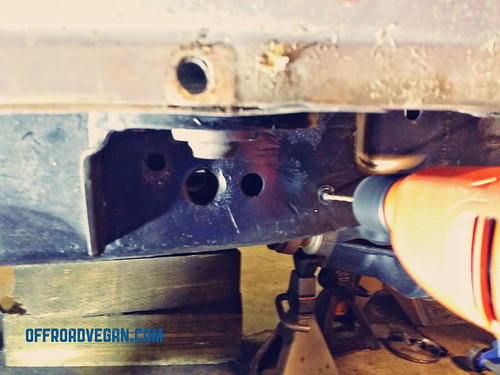
Keeping pressure on the bracket with the jack, use a sharp object to cut out the markings for the holes to be drilled. Remove the bracket and drill the holes. Start with pilots.
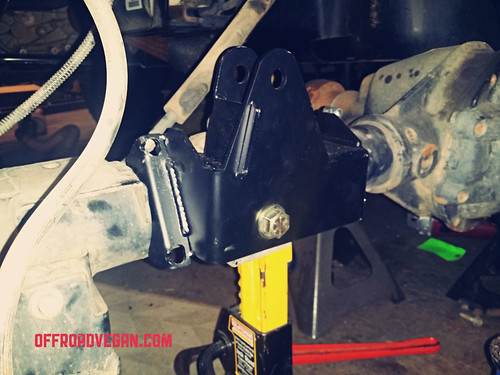
Attach the rear track bar mount. When attaching it, be careful not to over tighten the U bolts. They will snap. NOTE: We ended up trimming and welding this bracket in place. See week 3.
That took myself and 3 other friends two entire weekend days. So be prepared for a long process!
NOTE! We had to remove the exhaust from under the driver’s seat back to access the holes we drilled. We also had to drop (not remove) the EVAP cannister, and loosen the gas tank slid bolts (do not remove them as the tank will drop).
Week 2: Bumping and Grinding
We are holding off on the rear work, waiting for the welder. Even though EVO bills this as a bolt on kit, I would not drive down the freeway with it just bolted in. I feel like that is a sales gimmick to get you to buy it, then you will realize you want to weld it in.
We continued grinding and cutting. Robert helped by cutting off the frame brackets and I started the arduous task of grinding them down. He also removed the rear axle and I prepped it for the Artec rear truss and welding of the trackbar bracket.
I will spend my evenings this week grinding, grinding, grinding down those front stock brackets.
I will post an update after next weekend’s welding is completed!
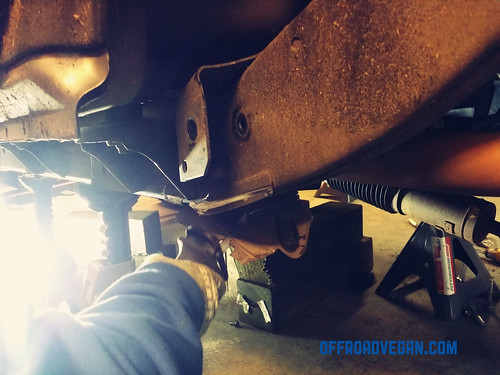
Week 3: Prep, Welding, and Painting
The welding is completed. Again, I HIGHLY recommend having this kit welded! It should not be billed solely as a “bolt on kit” but more of a “Hybrid” kit that requires minimal cutting and grinding (as compared to weld on kits) but still requires some welding.
NOTE: I also had an Artec rear D44 truss added along with this kit. Some adjustments needed to made to the truss AND the rear trackbar bracket from Evo. This eliminated the diff-side U bolt holes, which really aren’t needed anyway given this is now welded.

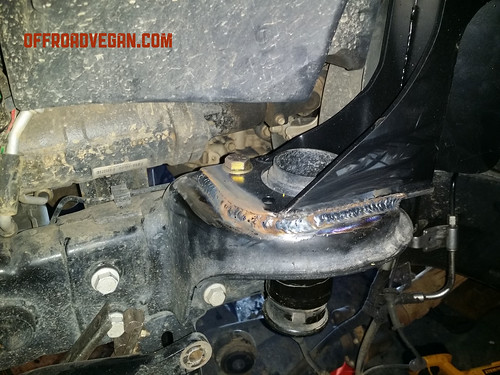
The coilover perch is obviously not part of this kit, but I had the bolt on coilover bracketry welded in at the same time as the long arm kit.

So this weekend was a lot of prep work and welding stuff.
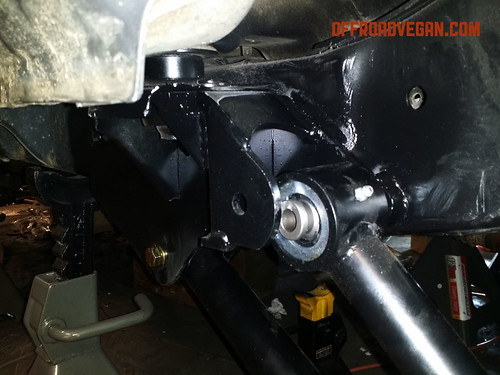
Week 4: Assembly begins
With all the welding cooled and painted, it is FINALLY time to start assembling the kit! This is also where a lot of gremlins really started to appear.
Primarily, the control arm bushings never really fit well. This could either be a fitment issue, or they tightened up with welding. Either way, some took a jack and BFH (Big F****NG HAMMER) and a lot of love. On the rear passenger upper, I even had to go in with a grinder to remove some bracket material. Pretty crazy.
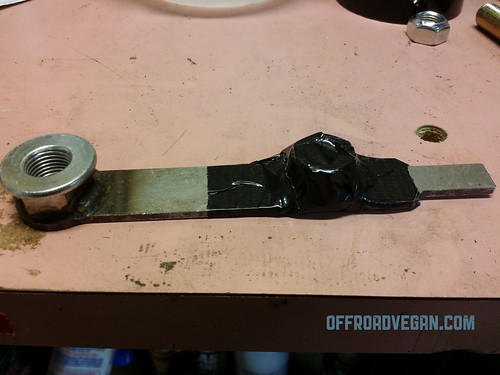
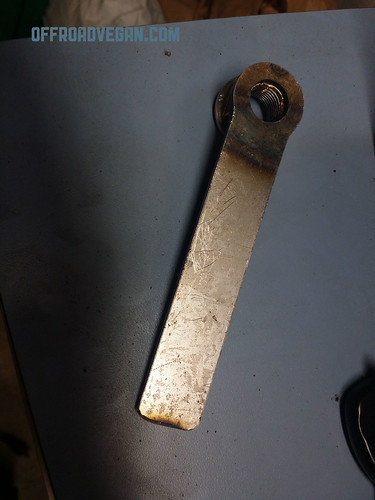
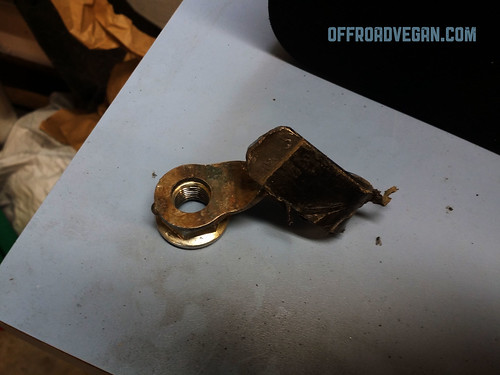
Since we are on the topic of the rear, let’s talk FLAG NUTS! Evo provides two flag nuts that slide into an existing frame hole, and connect to the rear upper control arm bolt. First and foremost, these just plain suck. They are too long, and do not have the right angle to be placed with needle nose vise-grips. So I trimmed them using a grinder. Second, when pressed against the inside of the frame, the nut obviously is askew. So I taped another nut to the end of the flag, thus allowing it to sit true when pressure is applied against the frame.
Third, the flags are VERY soft metal. When the nut was welded, it actually warped the bolt which required Herculean strength to thread. This made the flag actually collapse and free spin inside the frame. Yeah. Good times all around.
We eventually got it out, flattened it, and ran the bolt through the nut about 10 times, with some WD40. Eventually, we got both in place. This was one of the worst parts of this install.
Week 4 ended with the rear axle back in, and all rear arms ready to go.
NOTE: The rear sway link uppers should be OUTSIDE the mounting bracket.
Week 5: Finishing up
Week 5 focused on the front install.
We were unsure which bolts needed to go through the front brackets and through the crossmember (x4). The factory ones, we assume EVO wants you to reuse only left a couple threads, So I went to the local hardware store and grabbed some new grade 8s with some thread to spare. The front brackets will be welded in soon enough. Use a jack to remove downward pressure on the crossmember (it is holding up your transmission) and make removal/reinstallation of the bolts easy.
Once the front passenger was done, we turned to the front driver. And, yes just as expected we needed to cut out the famous “loop” and replaced with with some flexible exhaust tubing sourced at our local Napa.

Once all the arms and brackets were in, we double checked everything and made sure it was all tight, torqued, and ready. We added spacers and installed the tires.
I added a Synergy track bar (front and rear) and the drag link flip kit (yet to be installed).
The last step was the test drive!

You should get 3 flexy pipes and make your own custom loop !
LikeLiked by 1 person
Hi there! I read your post on the evo double d long arm install and it was extremely informative! Thank you for taking the time to put it together. I am writing because I am currently installing this kit and was hoping you might have more pics of the front control arm brackets being installed. I am a little perplexed on how I access the bolt holes for bolting them to the frame. Also did you weld these brackets into place like the rear brackets? Did you have a friend weld it in or hire a professional welder? If you hired someone what did it cost? I apologize for the inconvenience, but just like I did with the Evo rear tire carrier I am installing this kit myself and don’t really have any help. Any further pics or advice would extremely appreciated.
Thank you,
Kent B.
Arizona
LikeLiked by 1 person
Hello Kent! Unfortunately I did not take many photos of the front control arm brackets. The bolts should pass front to rear, with nuts going on the crossmember side. Note: I had to go to the HW store and buy longer grace 8 bolts. There were not enough threads (at least for me to feel comfortable with) when using the OEM bolts. I had a friend of a friend help with welding, he did my rear truss at the same time. I paid him $200 for all the welding. I did not weld the front CA brackets yet, but I do plan on welding them to the frame soon. GOOD luck and feel free to email me or ping me here with questions. Scott
LikeLike
I just did this install and would never do it again! So many thing had to be grinder and bent. I sti don’t fully trust the front brackets, they are kinda thin gauge metal and supported by the cross member which is almost sheet metal. I am installed a hd cross member and beefing up the brackets that hold it.
How do you like your evo long arm so far? Any issues? I wonder how long those joints are gunna last us, cause when the go out we have to do those stupid flag nuts again.
LikeLiked by 1 person
Oh man, I don’t even want to think about when that day comes. I might just sell the Jeep at that point. Hopefully they will last a while! Maybe I’ll just have a shop do the joint rebuild 🙂 So far, so good. Love the kit on the RTI and offroad (as well as onroad). Get that HD x member in ASAP. I have an install on here. Also I will be welding the front brackets to the frame soon.
LikeLike
Scott, I just finished the complete install of the EVO DD Long Arm Lift Kit (by myself I’ll add). I have a question for you. I installed the 4″ lift. After all is said and done my bump stops are about 1/4″ away from the new bumps stop purches evo supplies to be bolted to the rear axle. This is with the wheels on, setting on flat ground, dead load. Did you experience this as well or did you have more space than 1/4″ between your rear axle and stock bump stop? I callled EVO and they asked if my perch was 3″ or 4″. I measured and told them it was 4″ and they responded saying “well then we for sure gave you the 4″ springs. They advised to get spring spacers to remedy the problem. That doesnt sit well with me. Also, I will mention that I have the evo rear tire carrier with a 35″ toyo spare on it. My tires that I am riding on are 37”. Anyway, I thought maybe you could weigh in on this, being that you have the same lift as I do. I really appreciate it.
Kent
LikeLike
Hello Kent! So I also installed front and rear coilovers, so I am not plagued with the same problem as you. However, I installed the c/os right out of the box and am close to my bumps as well. Luckily for me, I will just adjust the c/os to raise the Jeep off the bumps. So, since that is the issue I would make a stink with Evo, and have them send you the right springs. Or have them send you spacers. I can’t believe (well I can, based on similar customer service stories I have heard from Evo) they want you to now go buy and run spacers due to their mess up. Good luck!!! Let me know how you end up.
LikeLike
Hey Scott thanks for this write up, it’s been really handy during the long arm install. I haven’t got to the flag nuts yet but I did run a 9/16 tap though than a bunch of times. They would’ve been a nightmare, thanks. I also did your exhaust mod and it worked like a charm. Question. Did you have to drop the gas tank to get to the through bolts for the passenger side bracket? Thanks again? Btw I have 2014 rubi.
LikeLiked by 1 person
Hey Brendon! Thanks for the comments and I am stoked it has helped you out! I did not drop the tank, but the grinding and work to get the bracket to work was creepy. We did loosen the bolts a little to make it easier, but did not drop it. We stuck a bunch of scrap steel pieces in the areas of the poly tank where we though an errant cutting wheel or sawzall blade would make for a bad day. Have fun with those flag nuts. Be sure to try my hacks!! Good luck and let us know how you make out!! Scott
LikeLike